How can I use my VacMaster® for packing school lunches?
Back to school is in full swing! Now that the kids are going to be out of the house and back to school, you've got to send them with something to eat!
I know that I personally get tired of eating sandwiches for lunch every day and honestly so do my kids. I prefer to make hot lunches for all of us, whether they are made ahead of time and stuck in the freezer, or if they are dinner leftovers packaged for use the next day.
For the sake of saving some time I'm going to leave that old sandwich out, it's a great go to for lunch, but it needs no explanation. Instead I'd like to cover the hot lunches that my children enjoy- they are just as easy as the sandwich.
Here's what you'll need:
 • VacMaster® Machine (any will work)
• Thermos
•Lunch Box
The machine I used is my Pro350; however you can use ANY machine that you have.
1. Make and portion the food
- First I made everything all at once, baked my casserole
- Made a batch of easy tomato soup
- Assembled my quesadilla (doesn't need to be heated up until you are ready to serve)
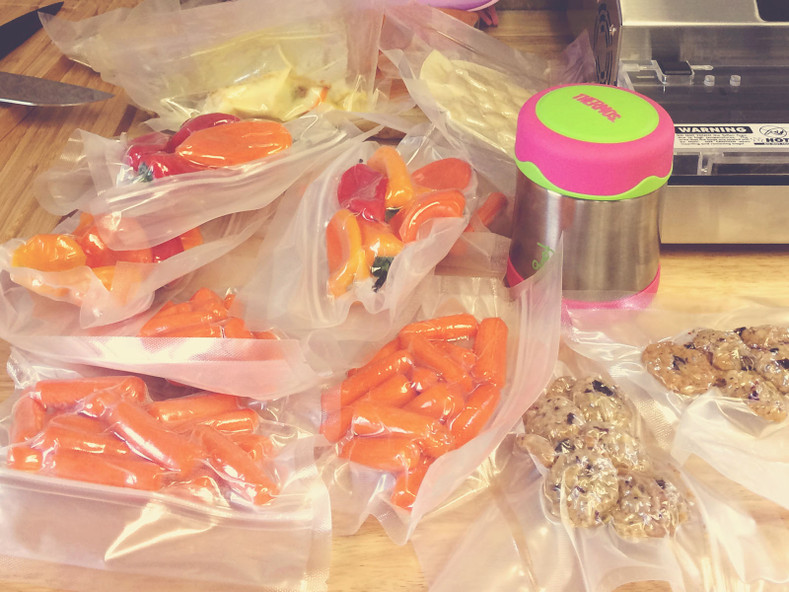
- Portioned my baby bell peppers
- Portioned my carrots
- Portioned the trail mix cookies
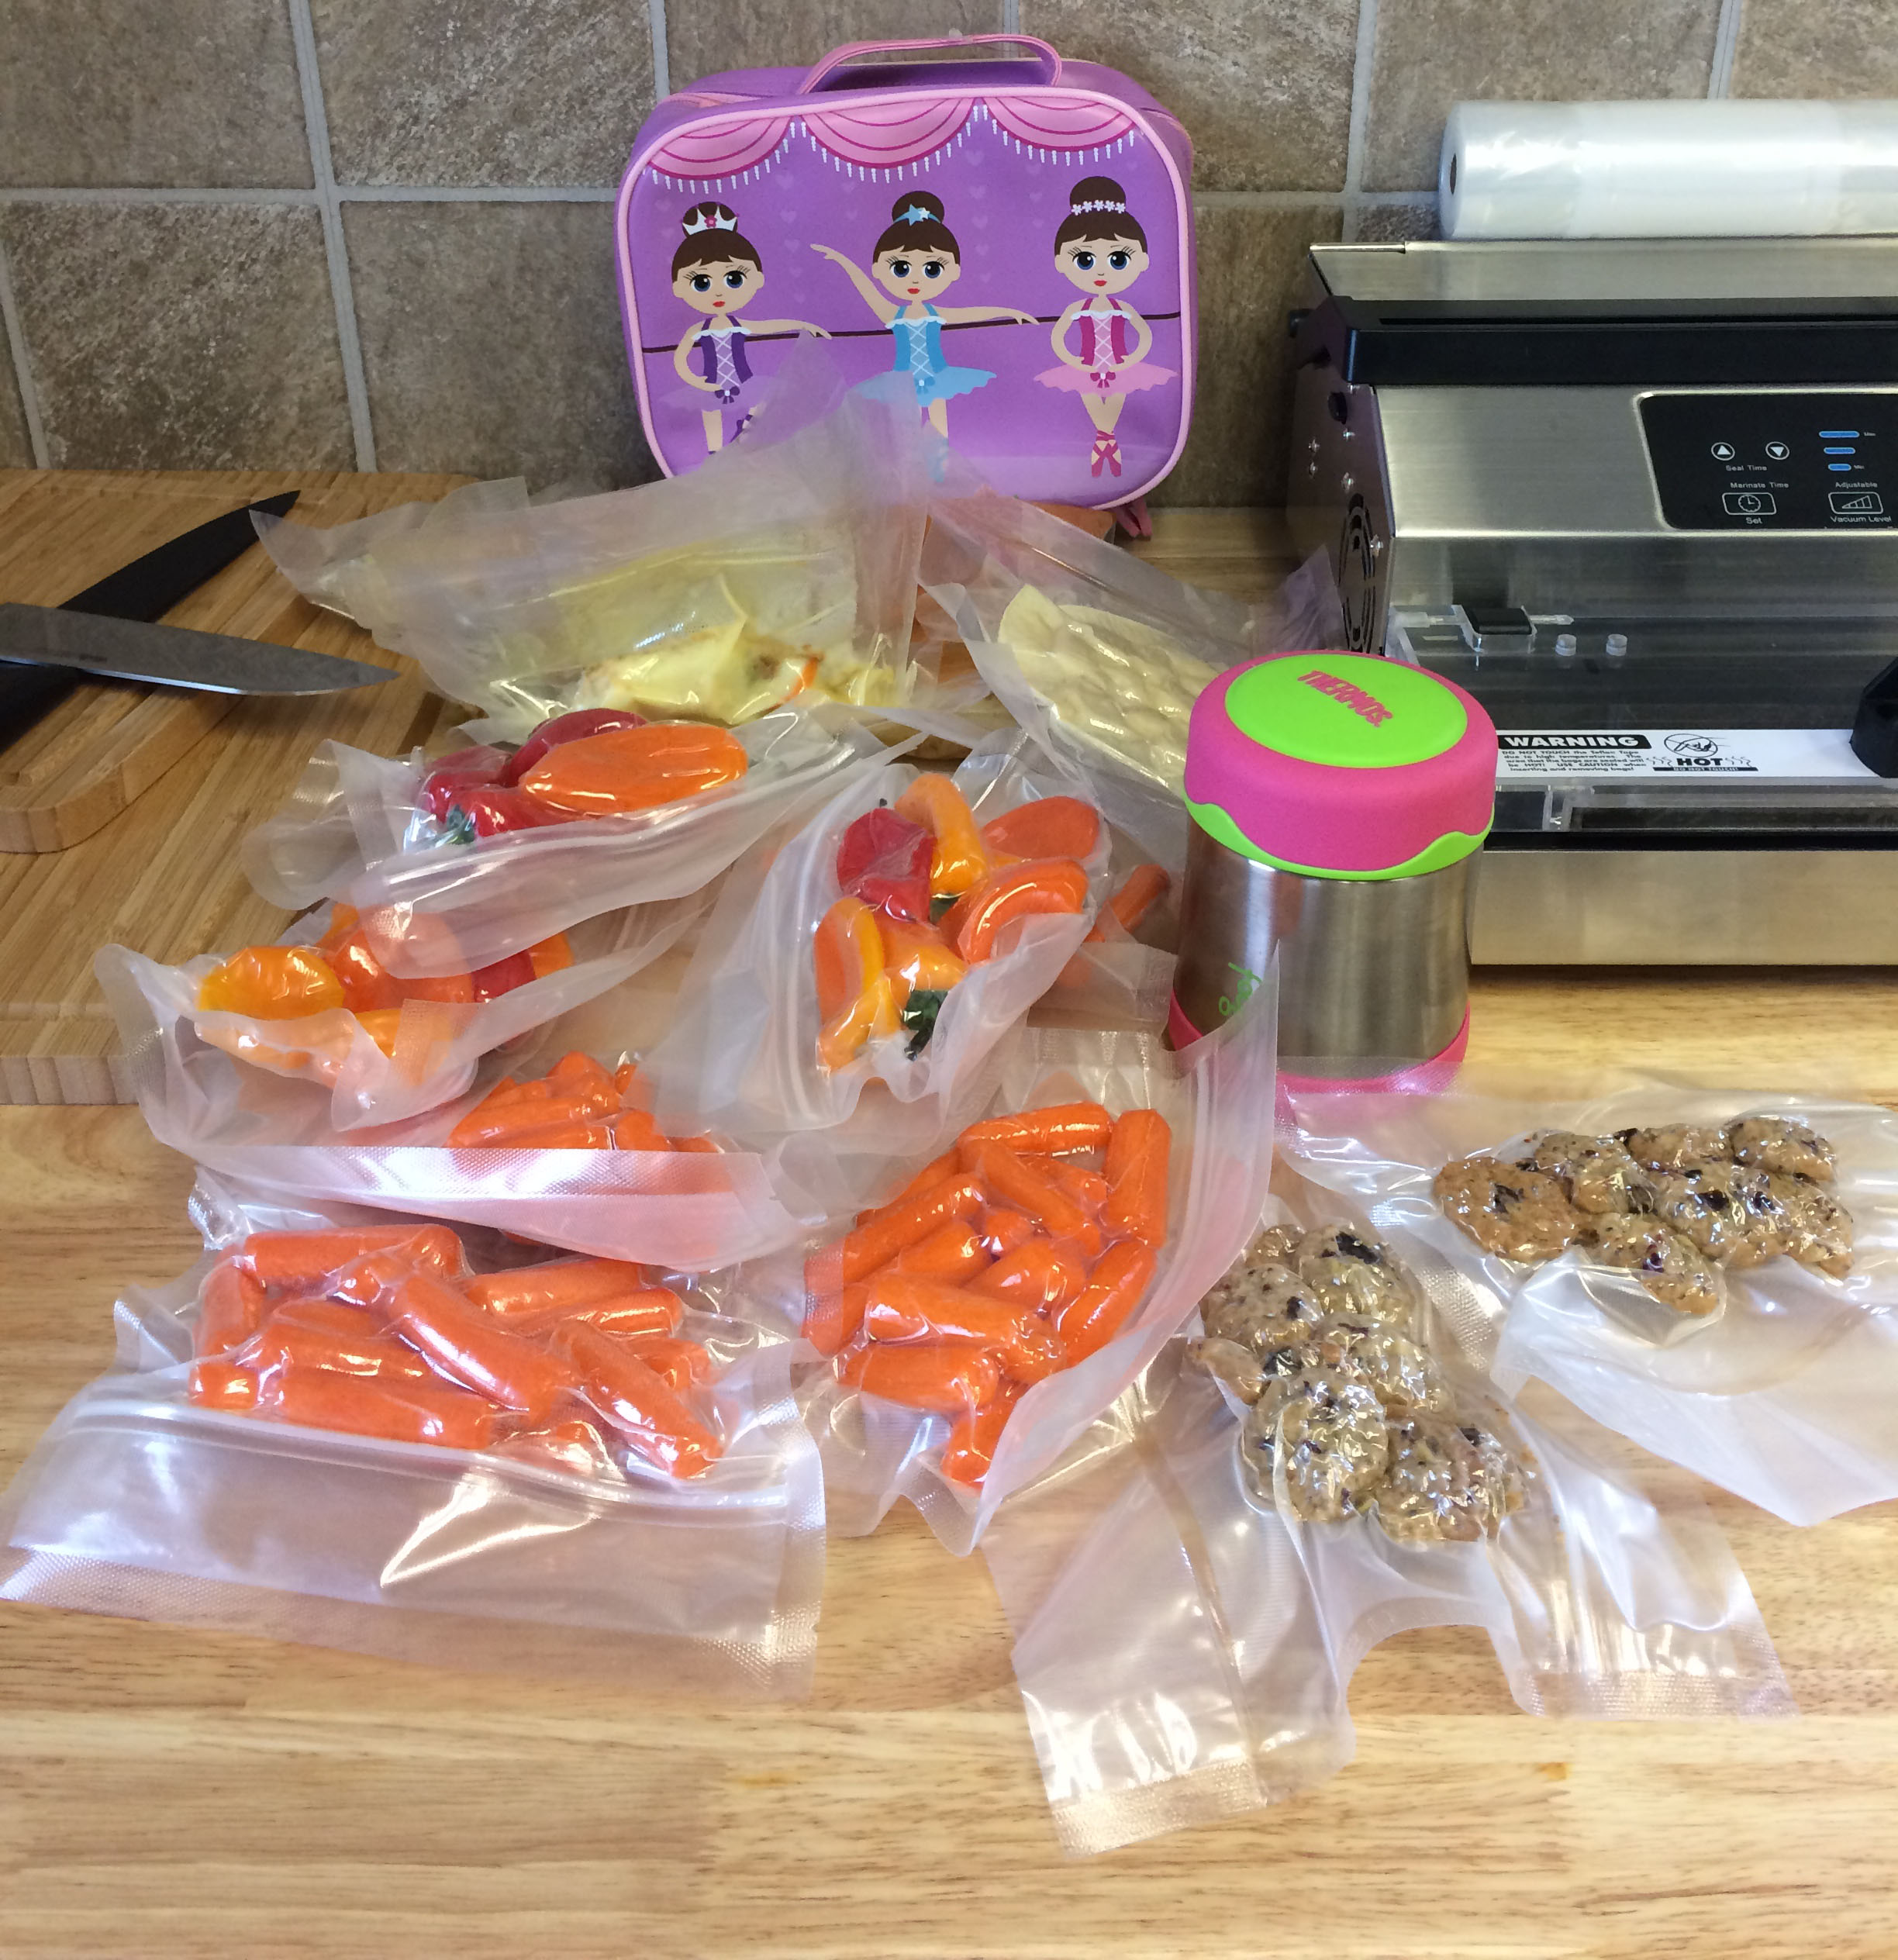
2. Bag and seal!
I used the 8" x 20' Roll (cut to whatever size I need) for the items that I knew I was going to open at home, and the 8" x 12" zipper bags for the food that would go straight from the fridge or pantry into the lunch box -they are easy for the kids to open themselves at school.

For the casserole, after baking I let it cool for a bit and then portioned it into the bags that I had cut and sealed while I baked and used the Multi-Ring Bag Stand to easily fill the bags without making a mess. After sealing all of my single portion bags I put them in the freezer.
I also used the bag stand for the soup, which I then needed to put in the freezer before sealing, because of its liquid state. Once the liquid was frozen I was able to seal the bag and toss it back into the freezer.
The quesadilla just needed two pieces of tortilla (I used corn) with your favorite cheese in the middle, put it in the bag and seal, then store in the fridge or freezer, depending how soon you would like to use it- it takes longer to reheat when frozen.
For the bell peppers, carrots and cookies I cut the zipper bags down to the size I wanted for each portion, filled them and sealed them. I only portion a weeks' worth of the bell peppers, we like them raw, so we do not freeze them, same goes for the carrots. After sealing the cookies I simply store them in my pantry.
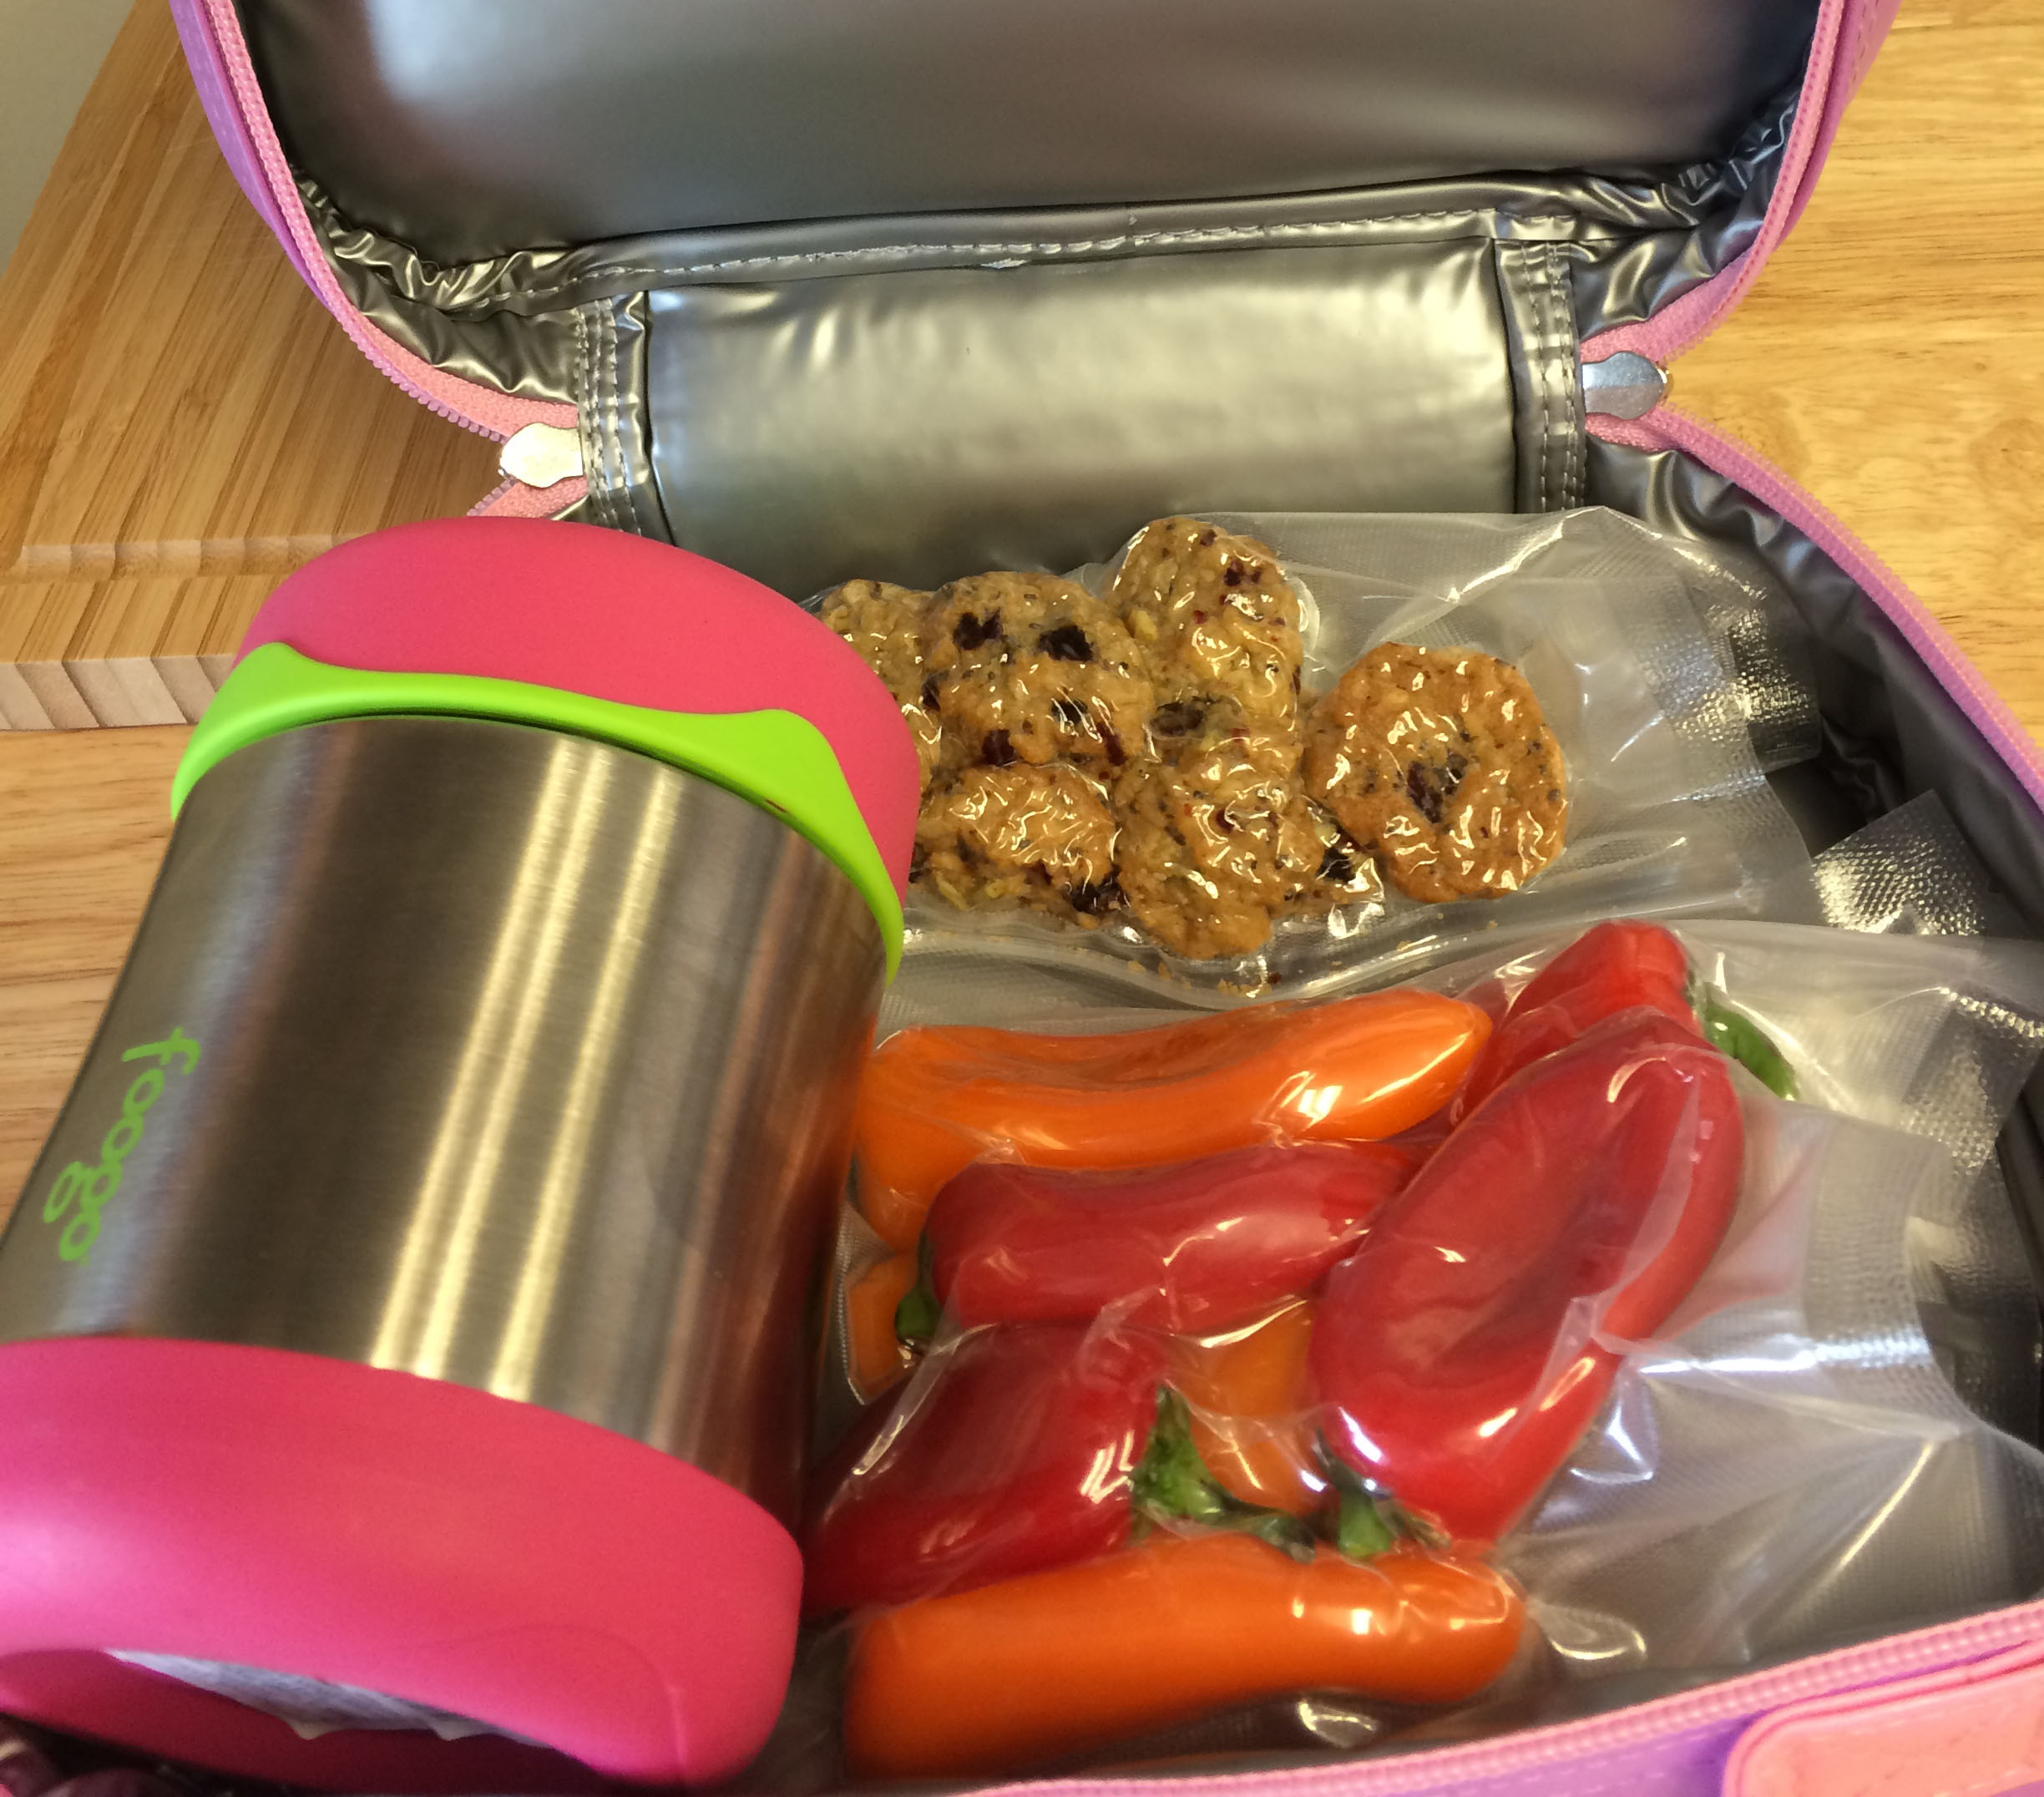
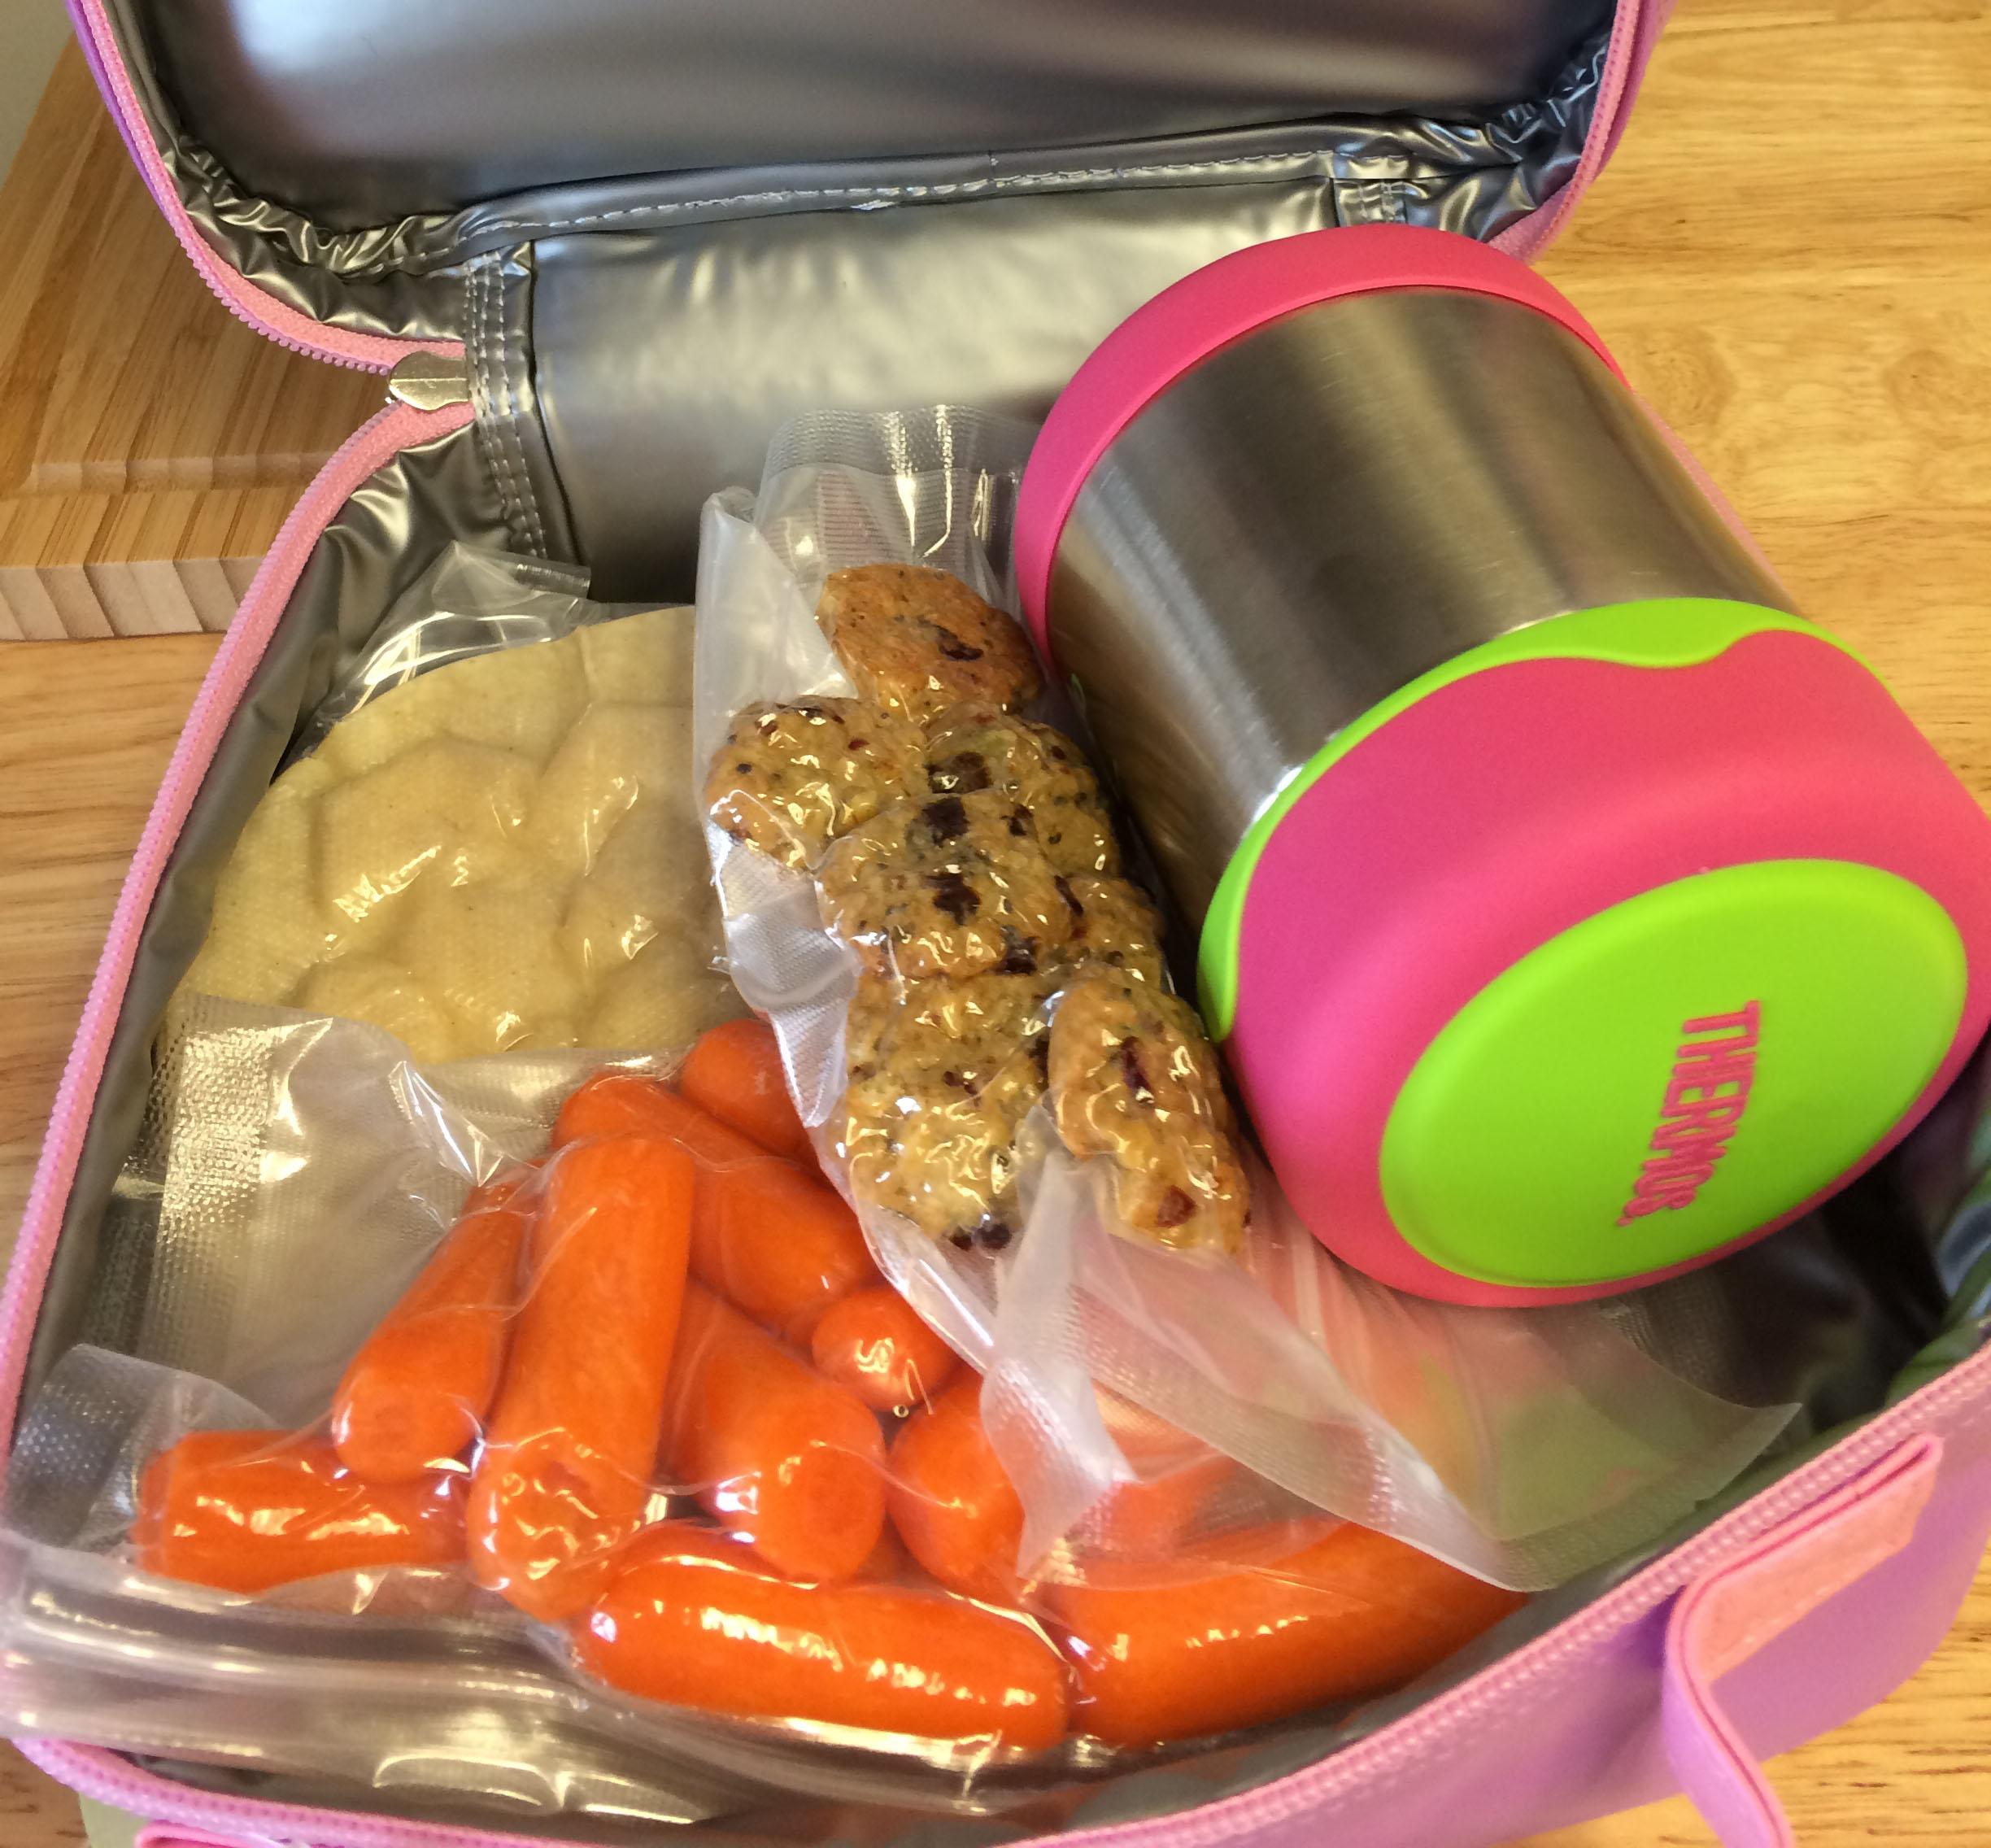
3. Put the lunch together
Now it is time to get out the lunch box and the thermos! For the "main course" items in the non-zipper bags such as the soup or the casserole, I like to move them from the freezer to the fridge the night before to let them thaw. In the morning I heat them up in the microwave still in the bag- then transfer them to the thermos to keep warm until lunch time. Make sure to send any necessary utensils for eating these meals as well. I do this same process if I am sending leftovers for a hot lunch!
The quesadilla I also heat in the microwave to melt the cheese and simply cut off one end of the bag and put it in the lunch box that way.
Lastly I choose a bag of veggies and a bag of cookies to round out the meal. My kids keep a water bottle with them at school all day for their drink; however you may choose to send milk juice or water in the lunch as well.
 Thanks to my VacMaster®, my children enjoy a fresh, hot lunch every day!